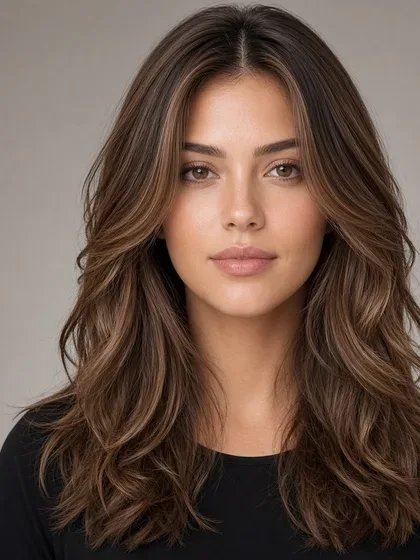
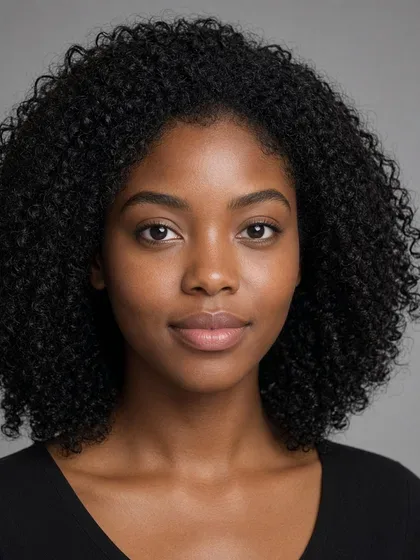
Middle Part Haircut: How to Choose the Right Cut and Ask for It
Learn which middle part haircut suits your length, texture, density, and growth pattern, plus what to request and how to style it.
A middle part describes where the hair separates, not one standardized cut. Curtain cuts, bobs, lobs, layered medium cuts, shags, long front-layered cuts, and short tapered styles can all support a center part. The underlying cut determines the length, movement, and fullness around that line.
The right structure depends on your current length, natural texture, density, root direction, and willingness to style. Start by checking how your hair falls, then choose the shortest front pieces, amount of layering, and edge fullness you want to maintain.
A Middle Part Is a Placement, Not a Single Cut
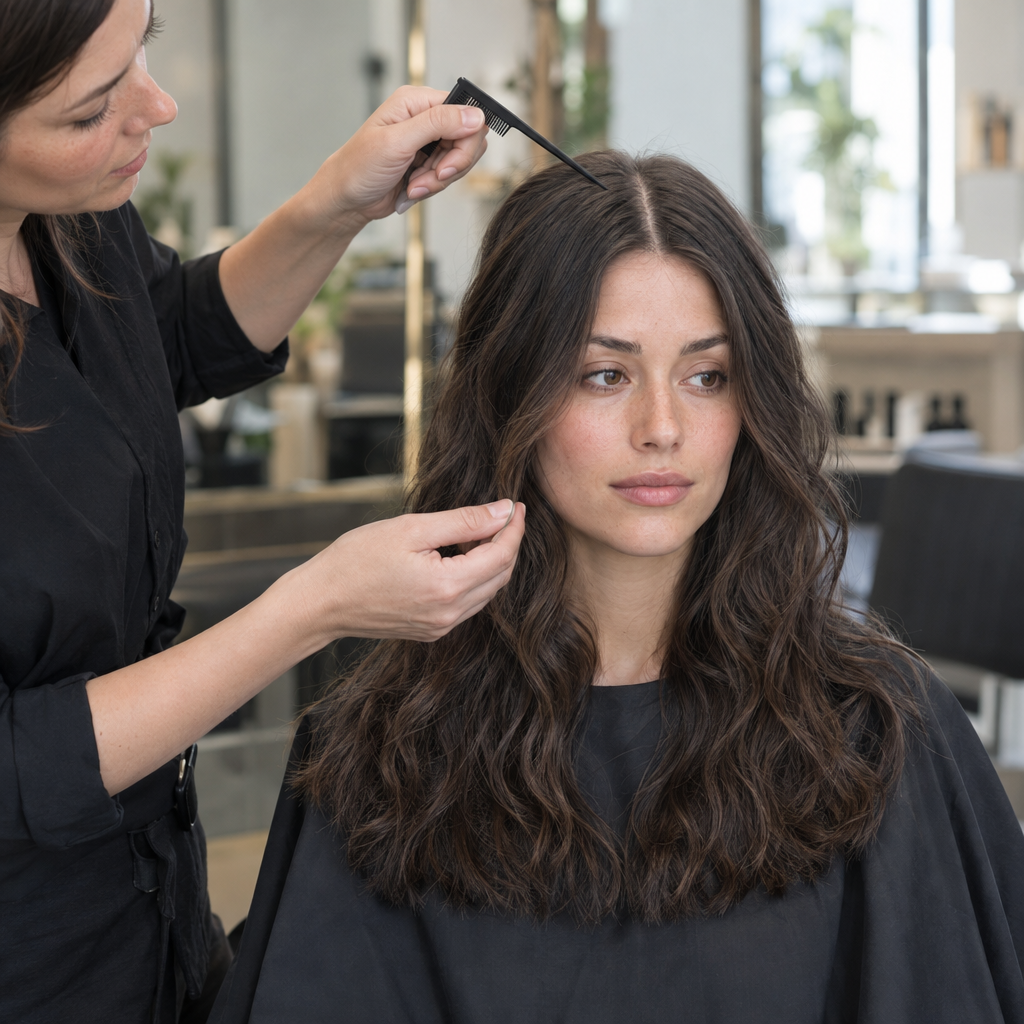
A center part can look sleek, softly divided, or loose and textured. It does not require identical-looking sides, a sharply drawn line, or a particular length.
These terms describe different things:
- Middle part haircut: Any haircut designed or styled to split near the center, regardless of its length or layering.
- Curtain cut: A short or medium-length cut with front sections that separate from the center and sweep outward.
- Curtain fringe: Shorter face-framing pieces that open from the center and blend into the rest of the haircut.
- Center-parted layers: Layers shaped to fall on both sides of a central part, without requiring short fringe pieces.
Many existing cuts can be worn with a middle part. However, short front pieces, strongly asymmetrical shaping, or resistant roots may prevent the result from matching a reference photo without further styling or cutting.
Check How Your Hair Falls Before Choosing the Cut
Use clean, dry hair in its usual texture, without deliberately setting a part. If you normally straighten or stretch it, check both that finish and its natural dry state.
- Locate the natural split. Let the hair settle, then note where it separates without help. A previously styled part may still influence this.
- Inspect both front growth directions. Gently lift each side at the hairline. Does one side grow forward while the other sweeps sideways?
- Try a center line for three to five minutes. Gently separate the hair near the middle, release it, and move your head normally. This is a practical observation period, not a guarantee of how the finished cut will behave.
- Find the front-piece bend. Note whether the hair turns outward near the cheekbones, curves inward near the chin, or hangs straight into the eyes.
- Watch for roots that spring away. Check whether either side immediately lifts, crosses the line, or opens a second split.
If the center stays reasonably settled, an exact middle part may be straightforward. If the roots repeatedly move it, a slightly offset visual center may need less daily effort.
Bring those observations to your stylist. “This side falls forward unless I dry it outward” is more useful than asking for perfectly symmetrical hair.
Compare Middle-Part Cuts by Hair Behavior and Effort
First, match the structure to your available length and natural movement. The length descriptions below are starting points, not fixed requirements.
| Cut | Current length | Texture behavior |
|---|---|---|
| Curtain cut | Front reaches intended dry landmark | Straight or bending; curly needs shrinkage allowance |
| Bob | Enough for chosen ear-to-chin edge | Straight, wavy, curly, or coily silhouette |
| Lob | Near shoulders or longer | Straight, wavy, curly; shoulder contact affects ends |
| Layered medium cut | Around chin to shoulders | Bends or separates through layers |
| Shag | Enough for crown-to-edge layering | Wavy, curly, coily; straight needs shaping |
| Long front-layered cut | Below shoulders for long perimeter | Straight, wavy, curly, or coily |
| Short taper or undercut | Top long enough to separate | Straight, wavy, curly; coily needs dry-length planning |
Next, compare weight distribution and the routine needed to preserve the intended finish.
| Cut | Density or bulk | Styling routine |
|---|---|---|
| Curtain cut | Preserve front density | Regular damp-root resetting and front shaping |
| Bob | Keep a defined edge; manage internal bulk | Minimal manipulation if the dry outline settles naturally; otherwise smooth or redirect the ends |
| Lob | Retain the edge; selectively reduce bulk | Minimal if the ends clear the shoulders; more adjustment if shoulder contact creates unwanted flicks |
| Layered medium cut | Adjust layers to available fullness | Minimal if the layers separate naturally; otherwise define selected sections |
| Shag | Separate dense sections; protect lighter edges | Often lower effort on naturally textured hair; straighter hair may need crown and front shaping |
| Long front-layered cut | Preserve the perimeter; concentrate shaping at the front | Usually focused on the front pieces while the longer perimeter needs less manipulation |
| Short taper or undercut | Choose side weight deliberately | Regular root resetting if the split resists, plus more frequent outline maintenance if the sides are close |
These are conditional effort comparisons. A naturally cooperative curtain cut may need less manipulation than a blunt bob whose ends turn unpredictably. Judge the routine against your own hair, not the name of the cut.
Seven Cut Structures That Work With a Center Part
1. Curtain cut: a defined split with shorter front pieces
A curtain cut may suit hair that already bends away from the face or responds easily to damp-root styling. The front creates the main feature, while the sides can stay fuller or sit closer to the head.
Ask for the shortest pieces to finish at a specific dry landmark, such as the eyebrow, cheekbone, or lower cheek. Explain whether they should curve away gradually or sit as a more distinct fringe.
The limitation is front maintenance. Small changes in length can shift a piece from sweeping outward to falling into the eyes, so the fringe may need reshaping before the rest.
2. Center-parted bob: a clear perimeter
A bob may suit hair that holds a defined outline, whether that outline is straight, softly waved, rounded, or textured.
Ask for an exact finished length and edge treatment: “At the chin when dry, with a full perimeter and only subtle internal shaping,” for example. Discuss how much length must remain for an ear tuck.
Strong root direction can make one side sit higher or open more than the other. A center line alone does not make the two sides behave identically.
3. Lob: movement around the shoulders
A lob offers more length than a bob and often more flexibility for changing the part or securing the hair back. The front can be level with the rest or longer, depending on the design.
Ask where the dry ends should sit relative to the shoulders, then choose limited or softly blended layering. Hair resting directly on the shoulders may flick outward, which can be either a desired feature or a styling consideration.
As the cut grows, its edge can lose definition. If the appeal is a crisp outline, plan to maintain that outline rather than simply preserving length.
4. Layered medium cut: adjustable movement and weight
This option may suit hair that needs more movement through the lengths or controlled bulk reduction. It is not automatically the best choice for every dense head of hair, nor does it require highly visible layers.
Specify whether the layers should be subtle, moderate, or clearly separated. Ask how the front pieces will connect to the side and back layers.
Excessive layering can leave the bottom looking less full. If density is limited, preserve the perimeter and concentrate movement where it is most useful.
5. Shag: visible separation and a stronger silhouette
A shag may suit hair that naturally forms bends or textured sections, especially when you enjoy a less uniform finish. It can also work on straighter textures, but the reference look may require more deliberate shaping.
Request a specific crown length, front-piece landmark, and degree of separation between layers. “Soft crown movement” and “short, visibly separated crown layers” produce different results.
A shag has a more pronounced grow-out pattern than a mostly one-length cut. Crown lift, fringe position, and edge fullness may change at different rates.
6. Long face framing cut: shaped front, retained length
Face framing layers are shorter pieces around the face that transition into longer hair. They create movement at the front and can emphasize selected areas without requiring layers throughout the entire cut.
Choose the shortest dry landmark according to where you want the front to open, bend, or begin transitioning into the longer perimeter. Hair texture matters because the same section may sit at the cheekbone when stretched but spring above it when dry.
As an optional visual preference, someone with a longer facial outline who wants more width around the cheeks might request an outward bend beginning near the cheekbones. On wavy, curly, or coily hair, that starting point should be checked in the normal dry texture so the finished bend does not sit higher than intended. This is a design choice, not a rule about which facial outlines can wear the cut.
Ask how quickly the short pieces will transition into the long perimeter and whether they will connect to the main layers. A gradual transition creates a different outline from a short front section that drops quickly into much longer hair.
The limitation is that long front pieces may create a gentle sweep rather than a pronounced curtain effect. Shortening them can strengthen that effect, but may also change how easily they tuck behind the ears.
7. Short taper or undercut: a longer top over closer sides
A short tapered style can support a center split when the top has enough length to separate and fall. An undercut creates a more disconnected contrast between the top and sides.
Ask for the top’s dry length, the amount of side weight, and whether the top should blend into the sides or remain disconnected. Show how much forehead you want visible.
The split may need regular damp styling, particularly when the top is short or the roots grow forward. Short sides also lose their freshly shaped outline sooner than longer silhouettes.
Adapt the Cut to Texture, Density, and Growth Patterns
Straight, wavy, curly, and coily textures
Straight strands tend to reveal the part line and perimeter clearly. Short or abrupt layers may therefore look more distinct than they do in a textured reference.
Naturally wavy textures can create a softer division, but the bend may turn outward on one side and inward on the other. Choose front lengths with that pattern in mind rather than expecting mirror-image movement.
Curly and coily textures create volume around the center line. Assess the shortest pieces in their normal dry state, including any stretching or definition method you regularly use. A wet or tensioned strand can appear substantially longer than it will sit when released.
There is no universal extra-length allowance for shrinkage. Show your stylist how your own pattern changes between wet, stretched, and dry states.
Dense hair versus lower-density hair
Dense hair may benefit from selective internal weight removal where it gathers heavily, often through the sides or lower lengths. Removing weight everywhere can disrupt the intended edge or increase separation beyond what you wanted.
For lower-density hair, fewer layers and a fuller perimeter may preserve visible fullness. A softer, less sharply drawn part can also make the division less prominent, though it does not change the amount of hair present.
If thinning is sudden, patchy, or noticeably progressing, seek advice from a qualified healthcare professional. A cut can change the outline, but cannot diagnose or treat hair loss.
Cowlicks, widow’s peaks, and uneven hairlines
A strong cowlick may cooperate better with retained length or a subtly offset center. Cutting the resistant section shorter can sometimes make it stand up more, so discuss its dry behavior before removing length.
Styling can guide the hair temporarily, but it does not permanently change the direction it grows. Natural differences between the two sides are normal and do not need to be eliminated.
Choose Reference Photos That Match Your Hair
Collect two or three references that show specific details you like, rather than many photos with unrelated structures. Short, medium, and long examples can all be useful if you identify which element you want to borrow.
Compare:
- Texture: naturally straight, wavy, curly, or coily, and whether the finish appears stretched or heat-shaped.
- Density: how much hair sits through the front, sides, and bottom edge.
- Shortest front piece: where it ends when dry.
- Layer visibility: blended movement versus clearly separated sections.
- Perimeter fullness: a solid edge versus a lighter, tapered finish.
- Root lift: flat, softly raised, or deliberately voluminous.
- Finish: air-dried, brushed smooth, or shaped into a pronounced bend.
Look across different presentations rather than restricting references by gender. The useful information is the structure and hair behavior.
Facial outline is an optional visual preference, not a rule about who can wear a middle part. Focus on where you want the front pieces to bend, how much of the forehead you want visible, and whether you prefer a closer or wider silhouette around the sides.
Photos cannot reliably show density, root direction, or how much styling created the result. Lighting, camera angle, extensions, and retouching may also change the apparent outline. Ask your stylist which details translate to your hair and which depend on a different routine.
Use This Five-Point Salon or Barbershop Request
Replace “I want a middle part” with five visible decisions:
- Overall dry length: give a body landmark, such as chin, collarbone, or below the shoulders.
- Shortest front-piece position: identify where it should finish in your normal dry texture.
- Layer intensity: choose minimal, blended, moderate, or visibly separated.
- Side weight and edge fullness: say where you want less bulk and where you want fullness retained.
- Part flexibility: explain whether the cut must also work with a loose, slightly offset, or different part.
Also describe your natural texture, usual part, and actual daily routine. Demonstrate an ear tuck or how you tie your hair back if those are non-negotiable.
A complete request might sound like this:
“I want the main length to sit just below my collarbones when dry. Keep the shortest front pieces around my lower cheeks, blending gradually into the sides. I want subtle layers, less bulk behind the ears, and a full bottom edge. I usually wear a loose center part, but it needs to work slightly off-center too. My hair dries with a wave, and I normally air-dry, with a quick blow-dry at the front. Please check the front length in that texture and leave enough for an ear tuck.”
Set and Style a Middle Part Without Flattening the Roots
Work on the roots before polishing the lengths. Trying to force a different split into fully dry hair often leaves the previous root direction underneath.
- Dampen the root area. After washing, remove excess water gently. For a morning refresh, dampen the front roots rather than automatically soaking every length.
- Create an approximate center. Use the bridge of the nose as a rough visual guide, then adjust around the hairline and growth pattern.
- Guide each side outward. Lift the roots slightly and direct the front sections away from the line instead of pressing them down against the scalp.
- Dry with controlled airflow. On straight or wavy textures, use fingers or a brush to guide each side outward. Keep the dryer moving and avoid concentrating heat on the scalp.
- Preserve curly and coily patterns. Arrange the part gently, then let sections form around it. Air-dry or diffuse with minimal disturbance rather than repeatedly pulling the front straight.
- Finish the front bend. Once the roots are settled, shape the lengths if needed. Use moderate heat and an appropriate heat protectant whenever heat styling.
Repeated styling may make the placement easier to recreate. It will not guarantee that a resistant growth pattern stops influencing the part.
Fix Common Middle-Part Problems and Plan for Grow-Out
| Problem | Adjustment | What to preserve |
|---|---|---|
| Flat roots | Redirect damp roots outward; lift while drying | Natural movement |
| Bulky sides | Request controlled internal weight removal | Intended perimeter |
| Sparse-looking ends | Reduce future layering; allow shorter sections to grow | Remaining edge fullness |
| Resistant cowlick | Use a slightly offset visual center | Cooperative front length |
| Front falls into eyes | Reassess dry length, bend, and connection | Desired sweep |
| Disconnected front layers | Blend the transition or grow shorter pieces | Enough length to connect |
Shortening is not always the answer. Front pieces that fall forward may need a different bend or a smoother transition into the sides. If too much length has already been removed, growing those pieces may be necessary before they can connect as intended.
After sleep, dampen the affected roots, recreate the split, and dry them in the desired direction. Keep product light near the center if buildup makes the roots collapse.
Maintenance depends on which detail matters most to you:
- Curtain fringe: reshape when the shortest pieces no longer clear the eyes or hold the intended sweep.
- Long front pieces: reassess when their bend drops below your preferred landmark.
- Short tapered sides: tidy when the outline loses the closeness or contrast you wanted.
- Bobs and lobs: refresh when the perimeter loses definition or shoulder contact changes the finish.
If a damp-root reset restores the look, styling was probably the main issue. If the front landmark, side weight, or perimeter has visibly changed, the cut itself may need adjustment.
Middle Part Cut Questions
What is a middle part cut called?
There is no single name. Depending on its structure, it might be a curtain cut, center-parted bob, lob, shag, layered cut, or tapered style with a longer top. Name the structure as well as the part.
Can any cut be worn with a middle part?
Many can, but not every cut will fall evenly around it. Very short fronts, strong asymmetry, or resistant roots may require adaptation. Changing the part can also expose differences in existing layers.
How long does hair need to be for a curtain-style middle part?
The front needs to reach the dry landmark you want and have enough length to bend or fall to either side. An eyebrow-length curtain and a cheekbone-length curtain require different amounts of hair. Curly and coily textures need assessment in their normal dry state, not just a stretched measurement.
Can a middle part work with short hair?
Yes, if the top is long enough to separate. Closely cropped hair may show a line without producing the falling sections associated with a curtain style.
Does a middle part work with curly or coily hair?
Yes. The line can be loose rather than sharply exposed. Plan the shortest front sections around dry shrinkage and preserve the natural pattern during styling.
What if a cowlick prevents an exact center part?
A slightly offset visual center is a practical alternative. Discuss retaining enough length to help the section settle, while accepting that some root direction may remain visible.
Why does a middle part look flat?
The roots may have dried pressed down, the front may carry more weight than the desired finish needs, or heavy product may be reducing lift. Start with damp-root redirection before assuming more layers are necessary.
How often do front layers or curtain fringe need trimming?
Use their position and behavior as the guide. A fringe worn close to the eyes may need attention sooner than longer front sections. Book a reshape when the pieces stop sitting at the agreed dry landmark or require more styling than you want.
Should the cut still work with a different part?
Only if that flexibility matters to you. Tell your stylist before cutting, since moving the part redistributes hair and can reveal different layer lengths. Ask them to show the finished shape in both your usual center placement and your preferred alternative.
For another way to explore possible cut directions before that conversation:
- Facefy’s Hairstyle Finder can help you explore options. Use those ideas alongside comparable reference photos, not as a guarantee of how your hair will fall.