Face Framing Layers: How to Choose and Describe the Right Cut
Learn how face framing layers work, compare placement and cutting options, and describe the exact result you want at your salon consultation.
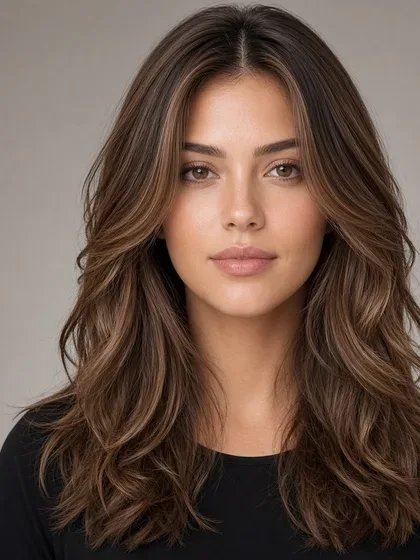
Front-focused layers are shorter sections around the face that add movement while leaving most of the overall length intact. The result depends on four choices: where the shortest piece ends, how quickly the sections lengthen, whether they connect to the rest of the cut, and how much fullness remains at the edges.
The most useful salon request describes those details alongside your natural texture, usual part, and daily routine. A cheekbone-length section designed for a round-brush blowout can behave very differently from one intended to air-dry, even if the inspiration photos look similar.
What makes front layers different from general layers?
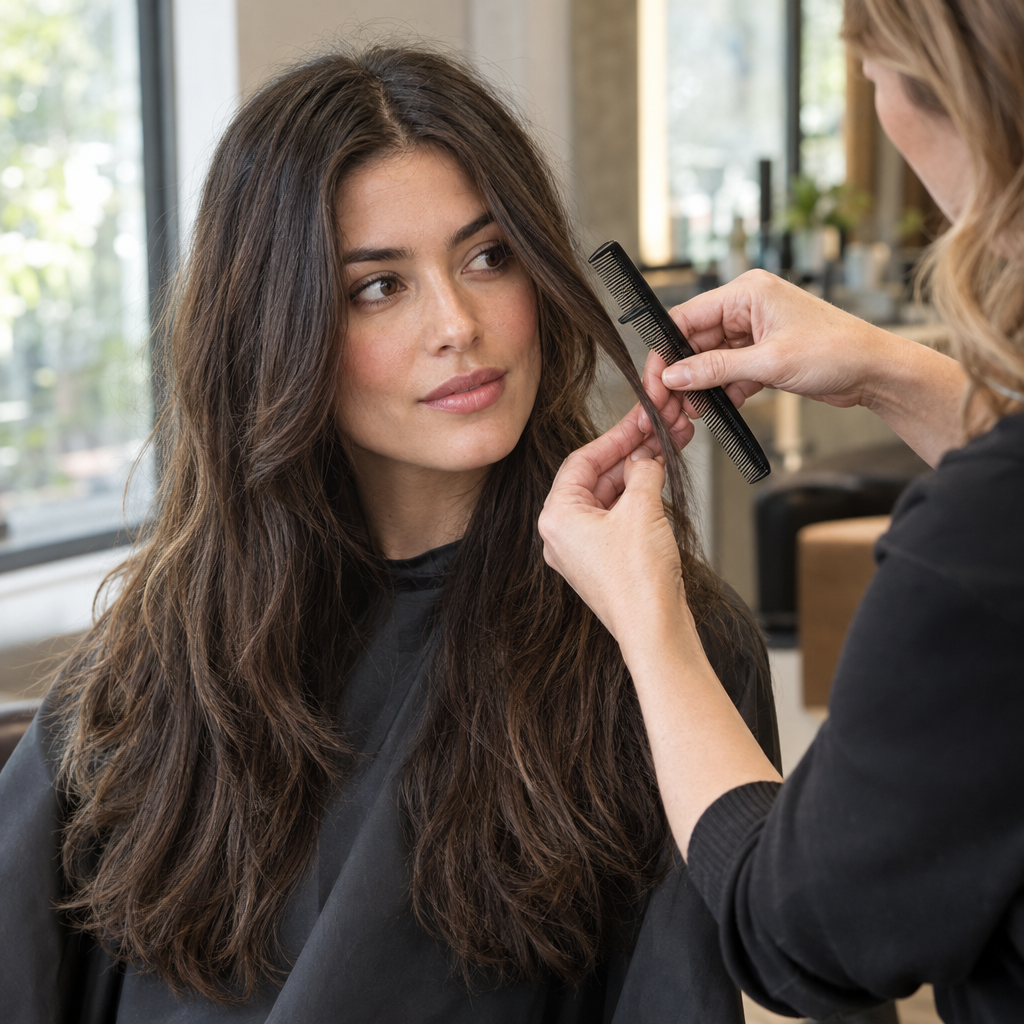
Front layers sit mainly around the hairline and sides of the face. General layering changes the distribution of length and weight across a larger area, potentially including the crown, sides, and back.
These options can overlap, but they describe different things:
- Front layers: Concentrate shorter pieces around the face, with little or no change to the back.
- Long layers: Distribute layering through longer hair rather than describing only the front.
- Internal layers: Remove or redistribute weight within the hair while keeping the outer outline comparatively continuous.
- An all-over layered haircut: Places shorter sections throughout the head, not just around the hairline.
Keeping the back length does not mean keeping every front strand long. A substantial front section can become shorter while the overall length remains unchanged. Ask how much hair will be included, not simply how much will come off the bottom.
The four choices that determine how the cut will look
Use these four variables to describe any reference you bring.
1. Where the shortest piece ends
Choose a visible landmark: cheekbone, chin tip, or collarbone. Specify where you want the section to sit when dry in your usual texture, not only when stretched or held straight.
The amount of hair included also matters. A narrow section at the hairline produces a different effect from a broad section extending farther into the sides.
2. How quickly the sections lengthen
A gradual transition passes through many intermediate lengths before reaching the longest hair. A quicker transition creates a more obvious difference between short and long sections.
Here, “graduation” describes that visible progression around the front. Your stylist may use the term more technically, so pointing out the transition in a photo is clearer than requesting “more graduation” alone.
3. Whether the front connects to the main layers
Connected sections flow into the side layers through intermediate lengths. Disconnected sections retain a deliberate length difference between the front detail and the main body of hair.
Connection describes the relationship between sections. It does not automatically determine whether the ends look soft or blunt.
4. How much fullness stays at the perimeter
The perimeter is the outer edge where the hair ends. Keeping it fuller gives the front ends a more substantial appearance. Removing more weight can create a lighter, wispier finish, but may leave already sparse ends looking thinner.
Two complete design descriptions show how these choices combine:
- Subtle movement: Shortest section at the collarbone when dry, gradual lengthening, connected sides, and a full front perimeter.
- Distinct front detail: Shortest section at chin-tip level when dry, a quick transition into longer pieces, deliberate disconnection from the main length, and lightly softened edges with most fullness retained.
Neither description depends on a trend name. Each gives the stylist something observable to work toward.
Where should the shortest layer start?
Start with the movement you want and the functions you need. Landmark placement alone cannot guarantee that a section will tuck behind an ear or reach a ponytail.
| Starting point | Visible effect | Practical trade-off |
|---|---|---|
| Cheekbone | Short, prominent front movement | Often needs directional styling |
| Jaw | Defined movement near the lower face | Tuckability varies by section |
| Collarbone | Longer, subtler front movement | Often easier to gather back |
Cheekbone-level pieces create a noticeable front detail. They may need deliberate drying to sit away from the eyes or bend in the intended direction. Do not assume they will tuck or stay in a ponytail.
Lower-face pieces offer more length for blending and may tuck more easily. However, a section ending near the chin can still fall forward, especially when it springs up as it dries.
Collarbone-level pieces tend to merge more gently into longer hair. They usually offer more flexibility for gathering the hair back, although ponytail position and the section’s starting point still matter.
Before cutting, show your stylist your usual ponytail and ear tuck. Ask them to demonstrate the proposed endpoint with a section of hair. For wavy, curly, or coily textures, discuss the expected dry position rather than using stretched length as the final guide.
How texture and density change the result
Texture describes the hair’s pattern. Density describes how much hair grows across an area. Fine hair refers to individual strand thickness, so it can also be densely packed.
Read both the texture and fullness categories below rather than choosing only one.
Texture considerations
-
Straight hair
- How the layers behave: Face framing sections tend to show their exact length and outline, creating a clean, visible progression around the face.
- What to watch for: Large jumps between sections can look stepped, particularly when the hair is worn sleek or left to air-dry.
- What to request: Ask for a gradual connection between the shortest front piece and the rest of the hair. Mention whether you usually wear it straight, tucked behind your ears, or styled with a bend.
-
Wavy hair
- How the layers behave: Natural bends can add movement and soften the transition between lengths without much styling.
- What to watch for: Waves may spring up differently on each side, so matching wet lengths do not always create a balanced dry result.
- What to request: Arrive with your usual part and explain how you dry your hair. Ask the stylist to place the ends where your waves naturally curve rather than relying only on the stretched length.
-
Curly or coily hair
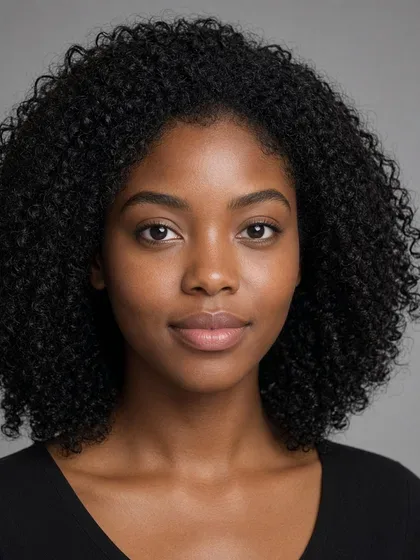
- How the layers behave: Individual curls or coils can form a defined outline around the forehead, cheeks, and jaw.
- What to watch for: Shrinkage varies across the head, which can make the shortest pieces sit higher than expected once dry.
- What to request: Ask for the front sections to be assessed in their natural state before the final length is chosen. If you alternate between natural, stretched, and heat-styled finishes, explain which one you wear most often and how much length variation you can comfortably manage.
Strand thickness and density considerations
-
Fine strands or a sparse front perimeter
- Benefit: Restrained layering can introduce movement without shortening everything.
- Risk: Broad sections or heavy thinning can reduce visible fullness.
- Salon discussion: Ask for a narrow front section, conservative length differences, and minimal unnecessary weight removal.
-
Medium-density hair
- Benefit: Often allows either a continuous blend or a distinct front detail.
- Risk: Removing weight by habit can still leave the ends lighter than you wanted.
- Salon discussion: Decide on perimeter fullness separately from the amount of movement.
-
Dense hair
- Benefit: Selective weight removal may help the front move more freely.
- Risk: Poorly placed short sections can expand or create uneven bulk.
- Salon discussion: Ask how the shape will settle when air-dried, particularly if your hair is also wavy or curly.
Your part and growth direction deserve equal attention. A cowlick may lift one side or split a section that looks continuous in a reference. Arrive with your usual part visible and explain how you normally dry the front.
Also distinguish a cut with natural movement from a styled bend. A photograph of a sweeping blowout does not show how the same lengths will hang without that styling.
Connected or disconnected layers: which finish do you want?
Connected layers transition into the sides through intermediate lengths. They can look continuous and blend gently as they grow, although subtle front sections may become less noticeable without styling.
Disconnected layers remain more distinct from the main length. They can give the front a clearer identity, but short pieces may separate, flip, or fall out of tied-back styles. Their growth may also reveal a more noticeable gap between the front and sides.
Connection works alongside transition speed and perimeter fullness. A connected frame can still look strongly defined, while a disconnected section can have softly textured ends. Ask your stylist to show where the front will meet the rest of the hair.
What different cutting techniques can create
Technique names are useful conversation starters, not guarantees of a particular result.
| Technique | Possible finish | Discuss caution when |
|---|---|---|
| Point cutting | Softer edges, controlled texture | Ends already look sparse |
| Slide cutting | Flowing transitions | Hair is fragile or breakage-prone |
| Razor cutting | Wispy movement, lighter ends | Frizz or fullness concerns dominate |
| Dry cutting | Natural-pattern placement | Hair arrives stretched or heat-styled |
Point cutting uses the scissor tips to work into an edge rather than leaving one solid line. Light use can soften the finish; more extensive texturizing can remove fullness you wanted to retain.
Slide cutting uses a sliding scissor action to create a tapered transition. Discuss how much weight will be removed, particularly on fragile strands or highly textured hair where the natural pattern needs careful consideration.
Razor cutting can produce tapered, airy ends. If your priority is a dense perimeter or your hair tends to become fuzzy, ask how the stylist would adapt the approach or whether scissors would better suit the result.
Dry cutting lets the stylist assess how the hair sits without relying only on wet length. It can be useful for natural curl placement and shrinkage, but hair that has been straightened will not reveal its usual unstretched shape.
Describe the finish you want first. Let the stylist choose the tools and technique suited to your hair.
How facial structure can inform placement without setting rules
Facial landmarks help describe an endpoint. They do not decide who can wear a particular cut. You might choose cheekbone-level movement to emphasize that area, or a collarbone starting point because you prefer longer pieces near your face.
Broad outline labels are optional styling references, not suitability rules. Texture, density, hairline, natural part, and daily practicality usually provide more useful guidance than a shape category alone.
How to judge a reference photo before showing your stylist
Use this five-point photo check to separate the design from the styling:
- Identify the styling. Look for a blowout, curling-tool bends, straightening, or a deliberately tousled finish. If you cannot tell, ask the stylist what seems necessary to reproduce it.
- Compare texture and density. Notice whether the hair resembles yours in its natural pattern and fullness. Extensions, products, and styling can make those qualities difficult to judge.
- Locate the shortest endpoint. Name a landmark rather than saying “about this short.” A bent section may be longer than its visible resting position suggests.
- Inspect the front ends. Are they full, softly tapered, or very wispy? Check the overall lower edge too.
- Look for connection. Can you follow intermediate lengths into the sides, or do the front pieces sit apart from the main length?
A front view may hide the side transition. Lighting, head position, and hair swept over one shoulder can also change what appears full or short. Bring a side view when available, and treat unclear details as questions rather than facts.
Two useful references with specific notes are better than several unexplained photos. For example: “I like the endpoint in this image, but I want the fuller ends shown in this other one.”
A five-part salon request that is more useful than a style name
Give your stylist these five details:
- Shortest acceptable point: Where the front must sit when dry.
- Connection: A continuous blend or a deliberately distinct front section.
- Perimeter fullness: Full, lightly softened, or intentionally wispy ends.
- Everyday finish: Air-dried, diffused, round-brushed, or heat-styled.
- Nonnegotiable functions: Ear tucking, glasses clearance, a ponytail, or your usual part.
Then describe the transition speed within your connection preference: gradual lengthening or a more obvious shift.
A practical request could be:
Keep the shortest front pieces no higher than chin-tip level when dry. I want a gradual, connected blend into the sides, with the front ends staying full rather than wispy. I usually air-dry with my natural side part. I need the sections to tuck behind my ears, so please leave them longer if that endpoint will not allow it.
Ask the stylist to account for shrinkage and demonstrate the functional limits before settling on the shortest length. If your preferred endpoint conflicts with your ponytail or ear tuck, decide which matters more.
If you still need broader reference directions after defining these details, Facefy’s style finder offers an optional next step. Treat possible looks as discussion aids, not predictions of how your hair will behave.
- Explore Facefy’s style finder for possible reference looks, then use the five-point photo check above to identify the details you want.
Maintenance and growth-out
Maintenance depends on how precisely you want to preserve the starting point. A short, defined section may stop sitting at the intended landmark sooner than a longer, softly blended section.
Connected pieces often merge into the surrounding length as they grow. Disconnected pieces may remain visibly separate until the difference in length becomes smaller or the transition is reshaped.
Rather than following one universal appointment schedule, watch for practical changes:
- The front starts falling into your eyes.
- A bend no longer sits where you want it.
- One side separates more noticeably.
- You spend more time styling than you intended.
- The ends lose the fullness or definition you prefer.
During growth-out, try adjusting the drying direction, adding a gentle bend, using pins, or tucking once there is enough length. Avoid complex corrective cutting at home, especially when shrinkage or cowlicks make the resting length hard to predict. Additional shortening cannot restore missing length.
Common front-layer problems and what to do next
These outcomes can have more than one cause. Start with a low-commitment styling adjustment, then discuss the design with your stylist.
| Outcome | Possible cause | Immediate option |
|---|---|---|
| Sparse-looking ends | Excessive layering or thinning | Gather ends with gentle styling |
| Layers vanish air-dried | Subtle transition or styling-dependent reference | Try directional drying |
| Pieces flip or separate | Cowlick or part conflict | Dampen and dry with the growth direction |
| Sections will not tuck | Insufficient length or underestimated shrinkage | Use pins or soft accessories |
| Gap beside main length | Strong or unintended disconnection | Style front and sides together |
For the next appointment, make the request specific:
- Sparse-looking ends: Ask to preserve more perimeter fullness and reduce thinning. Growing out shorter sections may be necessary; cutting more layers will not replace missing density.
- Layers that disappear: Ask for a more visible natural-state outline if that is your preference. Confirm that achieving it will not sacrifice fullness or tuckability.
- Flipping near a cowlick: Ask for the front to be assessed in your normal part and drying pattern. Some movement may need to be accommodated rather than eliminated.
- Pieces too short to tuck: Demonstrate the required ear tuck and set a firm dry-length minimum. A facial landmark alone is not a functional measurement.
- Awkward separation: Ask whether a small amount of connecting work would help. Blending removes more hair, so it may be better to grow the front first if the ends are already sparse.
Unexpected breakage, sudden thinning, or scalp discomfort is different from a styling problem. Significant hair or scalp changes warrant advice from an appropriate healthcare professional rather than further texturizing.
Front-layer FAQ
Can front layers work without daily styling?
Yes, if the design follows your natural pattern, part, and drying routine. Ask to see the shape in its usual dry state. A cut intended to air-dry may look softer or less swept back than a round-brushed reference.
Do they work with curly or coily hair?
Yes. The important details are the dry endpoint, shrinkage, and placement of individual curl groups. Explain how you normally wear your hair, including whether you alternate between natural and stretched styles.
Are they suitable for fine hair?
They can be. A smaller front section, restrained layering, and preserved perimeter fullness can add movement without removing more hair than necessary. Fine strands and low density are different, so the stylist should assess both.
Can they make the ends look thinner?
Yes, particularly if a broad front section is shortened or heavily texturized. That is not an unavoidable result. If fullness is your priority, say so explicitly and ask how much of the existing front edge will remain.
How do they grow out?
Longer, connected pieces often blend gradually into the sides. Shorter or disconnected pieces may go through more noticeable stages before joining the main length. The best starting point is one that leaves room for both the appearance you want and the ways you actually wear your hair.