Layered Haircut Guide: Types, Placement, and Salon Tips
Choose a layered haircut by length, density, texture, movement, styling habits, and the placement of the shortest layer.
A layered cut combines sections of different lengths to change how hair moves, where it holds weight, and how the overall outline falls. The right layers depend on your current length, density, natural texture, desired shape, and everyday styling routine.
Layers can create lift in one area while reducing fullness elsewhere. Low, softly connected layers often preserve a substantial bottom edge. Shorter or disconnected sections create stronger separation and a more noticeable silhouette. Neither approach is automatically better. Start with the effect you want, then choose the placement that supports it.
What a layered haircut changes
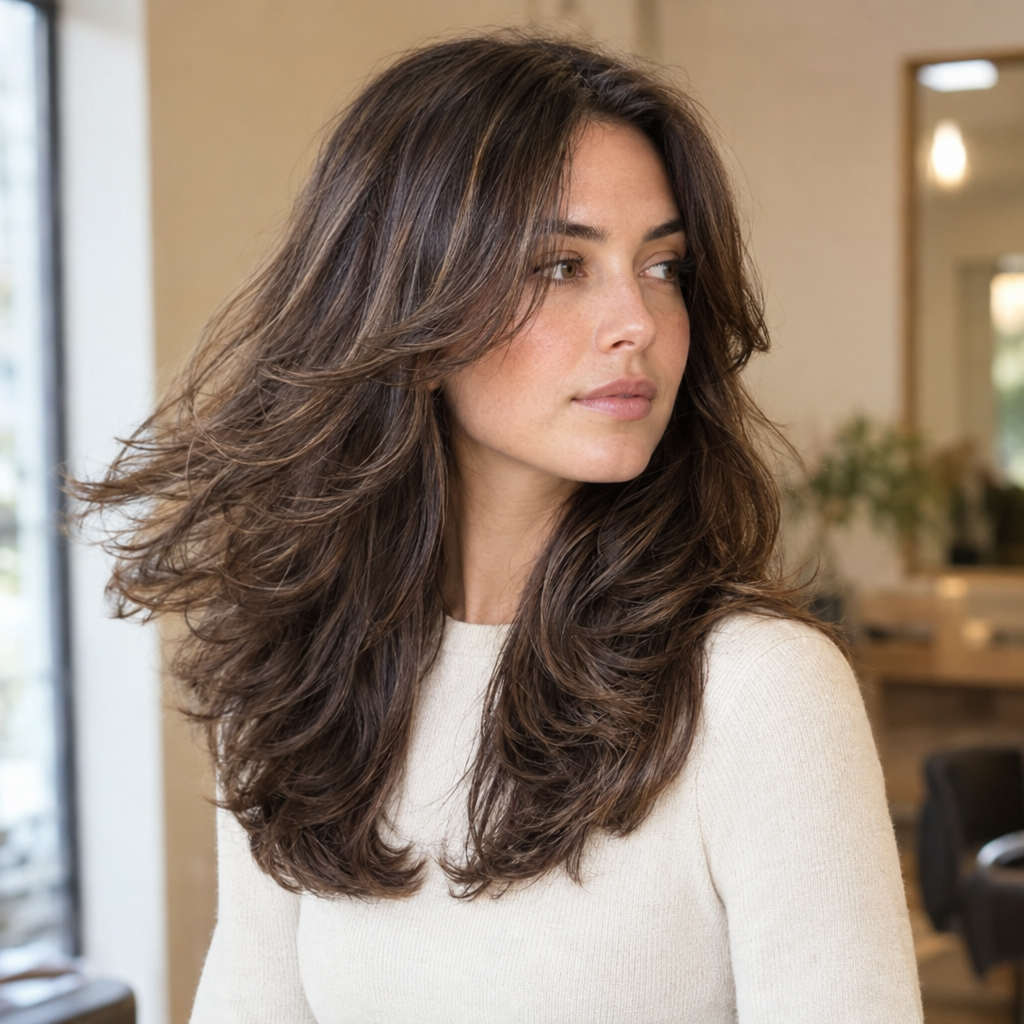
A one-length cut concentrates more of its weight at the bottom. Layers distribute the ends at different heights, changing the balance between surface movement, internal bulk, and fullness through the lower lengths.
A blunt finish and layering are not opposites. Hair can have internal layers while retaining a clearly defined bottom edge.
These terms help explain the structure:
- Perimeter: The outer boundary of the cut, particularly the bottom edge.
- Weight line: An area where the ends collect and create visible fullness or a heavier-looking band.
- Graduation: Progressively changing lengths that build weight and create a rounded or stacked shape. Graduation does not simply mean removing bulk.
- Internal layers: Shorter sections within the hair that redistribute weight while leaving much of the outer surface intact.
- Disconnected layers: Sections intentionally cut without a continuous transition between their lengths.
Shortening upper sections may help them lift because they carry less weight. Removing too much hair underneath, however, can leave the ends looking less substantial. More volume and fuller ends are different requests.
Decide what you want the layers to do
Look at your hair when it is dry and sitting in its usual part. Identify the main result you want before choosing a layer type.
Reduce internal bulk without changing the outline
If you like the overall shape but the inside feels heavy, your main goal is internal weight removal rather than obvious short pieces.
Ask your stylist: “Can we reduce weight in the dense areas while keeping the outer surface and bottom edge full?”
Concealed layering may help, but the stylist should first assess where the weight sits. Removing too much near the roots or from already sparse lower sections can create unwanted expansion or reduce perimeter fullness.
Add visible movement to a uniform surface
If the length is right but the surface looks too consistent, your priority is visible separation between lengths.
Ask: “I want visible movement through the surface, with the shortest overall layer finishing around this point when dry.”
Point to the desired endpoint on your hair. There must be enough difference between sections for the layers to show. Straight hair may still need directional drying to create a curved, flicked, or bouncy finish.
Change how the hair falls around the face
Front layers can emphasize the cheek area, soften the outline beside the lower face, or move hair away from the eyes. Their length and connection matter more than a trend label.
Ask: “I want the shortest front piece to finish at my chin when dry, then blend gradually toward the collarbone. Keep the back mostly unchanged.”
Use your facial outline as a reference rather than a rigid rule. Also consider your usual part, natural texture, preferred features, and whether you tuck the front sections behind your ears.
Useful visual references include:
- Facial outline: A facial shape estimate can give you another reference point when comparing front-layer placement.
- Front proportions: Face framing layers are shorter pieces around the face that connect toward the main length.
These tools and categories provide visual guidance, not fixed instructions about which style someone should wear.
Use five factors to narrow your choice
Write down one answer for each factor. Together, they give your stylist a clearer starting point than asking for “some layers.”
- Length: Is your hair short, around the chin or shoulders, or below the shoulders? Record the length you want to retain, not only where it sits now.
- Density: How much hair is present across your scalp? Assess this separately from strand thickness. Fine strands can occur in high-density hair, while coarse strands can occur in lower-density hair.
- Texture and curl behavior: Observe your hair in the state you usually wear it, whether straight, wavy, curly, coily, stretched, or heat-styled. Notice which sections lift, bend, contract, or expand most.
- Desired effect: Choose a first priority, such as preserving fullness, reducing bulk, adding movement, encouraging definition, or creating a dramatic silhouette.
- Normal routine: Record your part, air-drying habits, products, heat use, ear tucking, and tie-back needs. Choose layers for an ordinary morning rather than an occasional salon finish.
Tell your stylist about strong growth patterns, breakage, previous lightening, and chemical services. These factors can affect how much hair can be removed comfortably and how the remaining sections behave.
Where should the shortest layer begin?
The shortest layer often changes the finished silhouette more than the number of layers. Compare placement using dry endpoints rather than relying on vague labels.
| Dry-length zone | Likely effect | Main tradeoff |
|---|---|---|
| Above cheek level or around the crown | Pronounced texture and possible upper lift | Greater change to the upper silhouette |
| Between the jaw and shoulder | Clear movement through the middle lengths | Less fullness through the lower sections |
| Below the shoulder | Subtle movement on longer hair | Limited lift through the upper sections |
These are visual zones, not fixed cutting measurements. Crown layers originate at the top of the head, while front pieces originate around the hairline. Ask the stylist to show where each section is likely to fall naturally.
The shortest front piece does not have to match the shortest layer elsewhere. You can have chin-length front pieces and much longer layers through the back.
Total length also changes the result. A shoulder-level layer is a modest change on collarbone-length hair but creates much stronger separation on waist-length hair. Curly and coily sections may finish higher after drying, and some areas can contract more than others. Agree on the desired dry endpoint rather than judging only the wet or extended length.
Layer types compared by effect and upkeep
Layer names vary between salons, so describe both the structure and the intended result.
| Structure | Main effect | Best use | Styling and grow-out tradeoff |
|---|---|---|---|
| Long layers | Gradual movement with lower weight retained | Keeping a substantial perimeter | Usually subtle when air-dried; limited upper lift |
| Short layers | Stronger upper texture and separation | Creating a more noticeable silhouette | May require directional styling; take longer to reconnect during grow-out |
| Front-focused layers | Changes the outline around the face | Adjusting the front without extensive back layering | May need a quick front refresh; check ear-tucking and tie-back needs |
| Invisible or internal layers | Redistributes selected internal weight | Reducing bulk without obvious surface layers | Low visible styling demand when carefully placed; excessive removal can weaken fullness |
| Graduated layers | Builds weight into a rounded or stacked shape | Creating a controlled, sculpted outline | May need precise drying; the original weight line softens as it grows |
| Disconnected layers | Produces deliberate contrast between sections | Creating pronounced texture and separation | Grow-out can look uneven if the disconnection was not planned carefully |
A fringe that opens across the forehead is not the same as front layering throughout the sides. Likewise, shorter pieces near the face do not automatically require layers through the back. Ask where each section starts, where it ends, and how it connects to the surrounding hair.
How length changes the result
Short hair
Small differences in length can noticeably change the outline. Upper sections may stand farther away from the head, while graduation can build controlled fullness through the back and sides.
Because the sections are short, changes near the crown can be especially visible. Discuss growth patterns before removing substantial length from the top.
Medium-length hair
Layers can create movement around the chin, neck, and shoulders without a large difference between the shortest and longest sections.
Shoulder contact can make the ends turn outward even when the layers were intended to fall smoothly. Consider whether you usually wear the hair above, directly on, or below the shoulders.
Long hair
Long hair allows room for gradual transitions or dramatic separation. The main risk is removing so much supporting weight that only a narrow section retains the original length.
If fullness matters, ask how much hair will remain at the perimeter after the proposed layers are cut. A side or back view often makes this easier to judge than a front view alone.
How density changes the amount of layering
Lower-density hair
Restrained layering often makes sense when a substantial bottom edge is the priority. Internal removal is not automatically safer because taking hair from anywhere reduces the amount available to support the shape.
Subtle layers can still add movement, but the shortest section and the amount of separation should be chosen carefully. Avoid assuming that more texture will automatically create a fuller appearance.
Medium-density hair
A wider range of placements may be workable. Texture, condition, and the desired perimeter still determine how much separation is useful.
Someone seeking subtle movement may need only low, connected sections. A more pronounced silhouette may require shorter upper pieces or deliberate disconnection.
High-density hair
Selective weight removal can improve movement and reduce heaviness. Aggressive layering is not always necessary.
Short sections placed in the wrong area may expand outward or create a heavy ledge above thinner lower lengths. Identify where the bulk actually sits before deciding where to remove it.
Strand thickness also needs separate consideration. Someone with many fine strands may benefit from targeted weight removal, while someone with fewer fine strands may prefer very limited layering.
How texture affects layer visibility
Straight texture
Length changes are usually easy to see. Smooth connections matter if you want a soft transition rather than distinct steps.
Subtle layers may fall flat without styling. If your reference has curved ends or a bouncy finish, ask which parts come from the cut and which require blow-drying.
Wavy texture
Removing some weight may allow natural bends to become more visible. Cutting the upper sections too short can also introduce unexpected lift or outward flicks.
Evaluate the hair when it is dry and sitting in its normal part. The same section may appear longer when stretched or freshly brushed.
Curly texture
Layers change how curl groups stack and how the overall shape expands. The stylist should account for dry spring-back, uneven contraction, density, and the way different sections group together.
A rounded shape may require shorter sections in selected areas, while a length-preserving shape may keep the upper layers relatively restrained. Neither approach is universal.
Coily texture
Account for contraction, density, and whether the hair is usually worn in its natural state, stretched, or both. A shape designed for the natural state may look different when extended, and the reverse is also true.
No single wet-cutting, dry-cutting, or layering method is right for every curly or coily pattern. The useful question is how the stylist will account for your normal finish and the variation between sections.
For curly and coily hair, use visual previews only as a way to compare broad silhouettes:
- Preview option: Hairstyle Finder can help you compare length and shape directions before an appointment. A preview cannot reliably predict contraction, density, curl grouping, or how a specific cutting method will behave.
Camera angle, lighting, existing styling, and image quality can also change how a preview appears.
Cutting techniques affect the finish
Tools and techniques influence the edge, but placement still determines the overall shape.
- Point cutting: The scissor tips enter the ends to soften an edge or create separation. Shallow work can gently modify the line, while deeper work can remove more weight.
- Slide cutting: Scissors move along a section while cutting to create a tapered transition. Its suitability depends on the strand texture, condition, and desired softness.
- Razor cutting: A blade can produce a diffused, tapered edge. The result depends on the stylist’s technique, blade condition, and the hair being cut.
- Texturizing shears: Toothed blades remove selected strands rather than cutting every strand at the same point. Repeated or poorly placed removal can reduce fullness more than intended.
Instead of requesting a tool, describe the finish you want. For example: “I want a soft connection without wispy ends,” or “I want visible separation without extra crown lift.”
What to tell your stylist
Arrive with your hair in its usual texture when practical. Show your everyday part, demonstrate how you tuck or tie it back, and explain how often you style it with heat.
Use this consultation checklist:
- Shortest front piece: “It can finish at my chin when dry.”
- Shortest overall layer: “Keep the rest no shorter than shoulder level when it falls naturally.”
- Perimeter: “I want the bottom edge to remain full rather than visibly broken up.”
- Crown: “Keep the lift controlled,” or “I want more height through this area.”
- Part: “I normally part here, but I sometimes move it.”
- Routine: “It needs to work when air-dried because I only blow-dry occasionally.”
- Spring-back: “The front rises more than the back as it dries.” Show the difference if estimating it is difficult.
- Practical limits: “The front pieces need to stay behind my ears and reach when I tie my hair back.”
You do not need a precise contraction measurement. Showing how a section hangs naturally compared with how it looks when gently extended can be more useful than guessing.
Customizable salon script
“I want to keep the overall length at ____. The shortest front piece can finish at ____ when dry, and the shortest overall layer should finish at ____. I want the perimeter to look ____. Please keep the crown ____. I usually wear a ____ part and normally air-dry, diffuse, or blow-dry. The front sections need to tuck behind my ears or tie back. Please show me how the proposed layers will connect before cutting the shortest section.”
Example: preserving fullness while adding movement
Keep the shortest layers relatively low and connected. Retain enough hair at the perimeter to create a substantial bottom edge. Add only enough surface variation for the movement to remain visible in the hair’s normal dry state.
This direction is useful for lower-density hair, fine ends, or anyone who does not want a major change to the upper silhouette. It will not create as much crown lift as a shorter, more separated structure.
Example: reducing bulk and creating stronger texture
Use more visible separation through selected upper or internal sections while retaining longer lower lengths. Identify exactly where bulk should be removed rather than thinning the hair uniformly.
Ask the stylist to show where the shortest crown section will sit when dry. If some disconnection is intentional, clarify how obvious it should be and how it is expected to grow.
Bring front, side, and back references where possible. Point out the specific features you like, such as the perimeter, crown height, front length, or amount of separation.
Compare the reference person’s texture, density, length, part, and styling finish with your own. Photos can conceal extensions, heat styling, and finer ends, while lighting and camera angle can exaggerate volume.
Why layered cuts sometimes go wrong
Shelf-like transitions
Possible cause: An abrupt length change, a heavy weight line, or insufficient connection between sections.
Discuss: Softening the transition while preserving the ends, or making the separation look clearly intentional. Blending requires cutting additional hair, so ask how much fullness the correction would remove.
Thin or stringy ends
Possible cause: Too much weight removed from the lower sections, excessive texturizing, or short upper layers leaving relatively little hair at the perimeter.
Discuss: Pausing further thinning and gradually rebuilding the bottom edge. A perimeter trim may improve the immediate appearance, but restoring fullness usually also requires growth.
Excessive crown lift
Possible cause: Upper sections are too short for the preferred outline, particularly where the hair naturally grows upward or expands as it dries.
Discuss: Letting those sections lengthen and placing future layers lower. Removing more internal weight is not necessarily the solution.
Layers that disappear without styling
Possible cause: Subtle differences between lengths, straight natural fall, or a shape designed around a blow-dried bend.
Discuss: Whether you want stronger separation or simply a different finish. More visible placement changes the cut permanently, while a low-effort styling adjustment may be enough.
Uneven expansion in natural texture
Possible cause: Different sections contract or group differently, or too much length was removed from an area that already lifts strongly.
Discuss: Adjusting the dry outline rather than making every section technically identical. Symmetry in section length does not always create a balanced result once textured hair dries.
Unusual shedding, scalp symptoms, or a sudden change in density are separate from cut design. Bring those concerns to an appropriate healthcare professional rather than relying on layering to address them.
Styling layered hair
Choose a method that supports the cut rather than fighting its natural structure.
- Air-drying: Works best when the layers follow the hair’s natural fall. Set the part while damp and avoid repeatedly moving sections as they dry.
- Diffusing: Dries natural texture with less disturbance. Support sections gently and use comfortable heat and airflow if you want to retain the natural pattern.
- Blow-drying: Adds directional movement that subtle layers may not show on their own. A brush can turn the ends, smooth the front, or add controlled root lift.
- Hot-tool styling: Creates deliberate bends and separation, but it should not become an unexpected daily requirement. Use heat protection and avoid unnecessary repeated passes.
Styling products should match the finish you want. Lightweight smoothing or hold products may support movement without making the sections clump heavily. More textured finishes may benefit from products that add separation, but using too much can make fine ends look less substantial.
Maintenance and grow-out
There is no universal trim schedule. A precise short shape may need attention around every four to eight weeks, while softer and longer shapes may remain comfortable for eight to twelve weeks or more. Growth rate, condition, and tolerance for a changing outline matter more than the calendar.
Worn or split ends can make the perimeter look uneven and interfere with a smooth finish. Trimming them can improve the edge, but frequent trims do not make shorter layers catch up faster.
To grow layers out:
- Stop repeatedly shortening the upper sections to recreate the original shape.
- Trim the perimeter selectively as the shorter sections gain length.
- Soften awkward connections only when the benefit outweighs the additional length removed.
- Manage growing front pieces with a shifted part, ear tucking, pins, or gradual reconnection to the surrounding length.
- Agree with your stylist on which sections should remain untouched during each appointment.
A heavily layered shape will change in stages. The crown may settle before the front pieces reconnect with the lower lengths, so the transition will not look perfectly even at every point.
Layered cut questions
Do layers add volume or remove it?
They can do either. Shorter upper sections may lift more easily, while internal removal reduces bulk. Neither approach necessarily preserves fullness at the bottom, so specify where you want volume and where you want weight retained.
Can layers make hair look shorter?
Yes. Higher or disconnected sections expose more short lengths and change the visible outline even when the longest perimeter remains unchanged.
What is the difference between layers and graduation?
Layers typically release weight and create movement by distributing lengths. Graduation builds weight through progressively changing lengths, often producing a rounded or stacked shape. A cut can combine both techniques.
Are invisible layers actually invisible?
They are intended to be less obvious on the outer surface, but they still change weight distribution and movement. Their effect can become more visible when the hair moves, is tied back, or grows out.
Can the front be layered without changing the back?
Yes. Front sections can be shortened and connected gradually into the main length while the back remains mostly one length. Clarify the shortest dry endpoint and how far back the shorter sections should extend.
How is layering different from a named trend cut?
Layering is a structural technique. Named styles combine it with choices about fringe, crown length, front pieces, perimeter, and styling. Two cuts with the same trend name can behave very differently.
How can layers grow out more evenly?
Let the shorter sections gain length while trimming the bottom edge strategically. Protect the sections that need to catch up rather than repeatedly recreating the layers you are trying to grow out.
Before your appointment, save references that show the desired silhouette from the front, sides, and back. Focus on shortest-layer placement, perimeter fullness, crown shape, and realistic styling commitment rather than relying on a trend name alone.