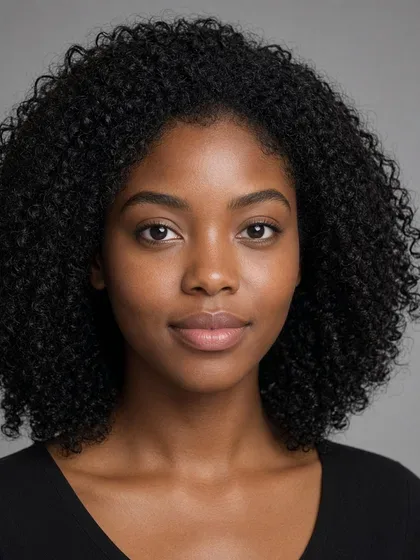
Bixie Haircut Guide: Variations, Styling, Salon Requests, and Upkeep
Learn what defines a bixie haircut, compare key variations, and plan layers, salon requests, styling, maintenance, and grow-out.
A bixie haircut combines the cropped shape of a pixie with some of the length, movement, and fuller outline of a short bob. It usually keeps longer sections around the front or sides while sitting closer to the head at the nape. Some versions expose the ears, while others leave enough length to cover or tuck behind them.
There is no single standardized bixie. Crown layers, fringe, ear coverage, and neckline shape can change it considerably. The best version depends more on your hair’s texture, density, growth patterns, and daily routine than on rigid face-shape rules.
What Makes a Haircut a Bixie?
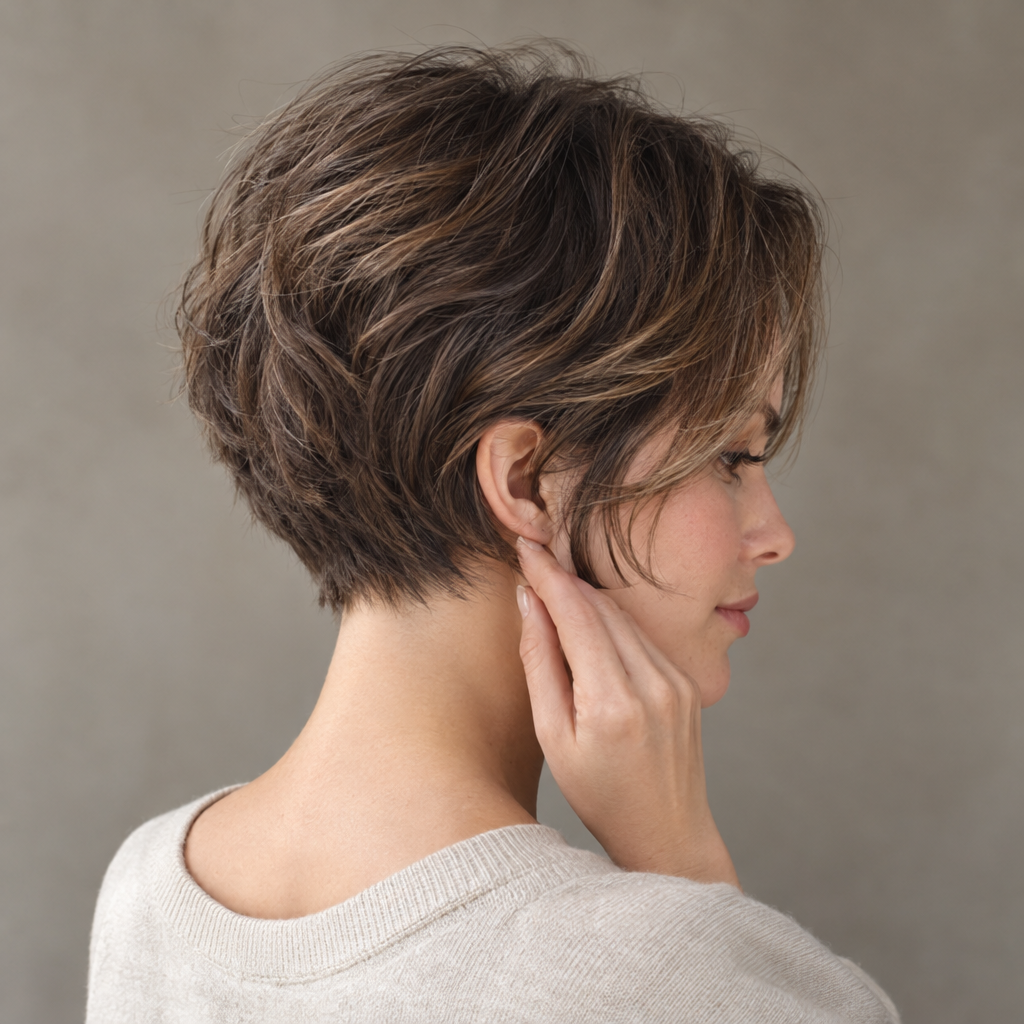
A bixie gets its character from where length and weight are retained, not simply from being short. Look for a layered crown, a shaped nape, and longer front or side sections that move independently rather than forming one continuous bob-length edge.
The perimeter is the outer edge of the haircut around the forehead, ears, and neck. A fuller perimeter makes a bixie look more bob-like. A lighter, more exposed edge takes it closer to a pixie.
These are typical differences, not strict boundaries:
| Feature | Pixie | Bixie | Short bob |
|---|---|---|---|
| Ear exposure | Mostly exposed | Exposed or partly covered | Usually covered unless tucked |
| Nape | Close or tapered | Shaped close or softly extended | Fuller edge near the jaw or above |
| Front length | Short or deliberately elongated | Longer fringe or cheekbone-reaching sections | Often approaches the main perimeter |
| Crown layering | Usually short and prominent | Layered with longer connecting sections | Often longer; layering varies |
| Perimeter weight | Light and exposed | Soft fullness with broken edges | More continuous and substantial |
| Overall impression | Compact and cropped | Short with movement and retained softness | Fuller and more clearly outlined |
One stylist may interpret “bixie” as a grown-out pixie, while another may picture a heavily layered short bob. Reference photos and descriptions of the outline are more dependable than the name alone.
Four cutting terms worth knowing
- Tapering: Hair becomes progressively shorter toward the neckline or around the ears. A taper does not necessarily mean shaved skin.
- Graduation: Shorter sections support longer sections above them, building a shaped area of weight, often at the back.
- Layering: Different lengths within the haircut change how volume and movement are distributed.
- Texturizing: Selective cutting breaks up an edge or removes weight. It changes the finish but cannot substitute for a well-planned shape.
A bixie can combine all four techniques, but it does not need aggressive thinning to look textured.
Would a Bixie Work With Your Hair and Routine?
First, separate strand thickness from density. Fine hair has relatively slender individual strands, while lower-density hair has fewer strands across an area. Hair can be fine and dense, or coarse and lower-density. Those combinations require different cutting decisions.
Use the rows that describe your hair together rather than choosing only one.
| Hair situation | Useful adjustment | Discuss cautiously |
|---|---|---|
| Fine strands | Preserve fuller ends and longer layers | Heavy thinning or extensive razoring |
| Thick, coarse strands | Retain length where hair springs outward | Very short, unsupported side sections |
| Straight hair | Blend transitions and plan the perimeter carefully | Visible steps between disconnected layers |
| Wavy hair | Place layers around natural bends | Short layers that kick outward |
| Curly or coily hair | Plan the dry shape and section-specific shrinkage | Uniform lengths without shrinkage allowance |
| Lower-density hair | Keep a connected, substantial perimeter | Deep separation that exposes more scalp |
A quick suitability check
Before booking, answer these questions:
- How much ear exposure feels comfortable? Tuck one side back and compare it with the other. This will not reproduce the finished cut, but it can show how you feel about a more exposed outline.
- Where do you want volume? Choose crown lift, fullness around the cheekbones, or a closer overall silhouette.
- What happens when your hair dries without styling? Note crown swirls, fringe separation, outward bends, curl expansion, and areas that sit flatter.
- How much hands-on styling will you do? Distinguish two minutes arranging damp hair from ten minutes with a dryer and brush.
- How often will you return for shaping? A precise nape usually needs more attention than a soft, longer outline.
- Do you need to tie your hair back? Most bixies will not form a full ponytail. Clips and partial tucking may replace it.
Face proportions can help you choose volume placement, but they do not determine whether you can wear a bixie. More crown height can create a taller-looking silhouette, while fullness at the sides can add visual width. Neither effect is inherently better.
Bixie Variations and How They Affect Styling
Bixie variations often overlap. You might combine a side part, softly connected layers, and a tapered nape in the same cut.
| Variation | Defining choice | Styling effort | Main maintenance consideration |
|---|---|---|---|
| Softly layered bixie | Blended layers and a softer perimeter | Low to moderate | Weight may build around the ears |
| Tapered bixie | Progressively shorter nape or sides | Low daily effort | A precise taper shows growth sooner |
| Shag-inspired bixie | Shorter crown layers and separated ends | Moderate | Crown layers can become uneven during grow-out |
| Curly bixie | Shape planned around natural curl groupings | Varies by curl pattern | Dry length and shrinkage must be considered |
| Side-parted bixie | Longer front directed from a side part | Low if it follows natural growth | The front may need regular trimming |
| Longer-front bixie | Front retained toward the cheekbones or jaw | Low to moderate | Front and back may need different trim schedules |
| Low-graduation bixie | Modest weight built near the lower back | Low to moderate | Too much graduation can create a stacked shape |
Softly layered bixie
This is often a manageable introduction to shorter hair because it preserves a softer outline and tends to grow out less abruptly. On dense hair, ask how the weight around the ears will be controlled without leaving thin or hollow ends.
Tapered bixie
Decide whether you want a scissor-soft taper, a closer clippered finish, or visible skin at the shortest point. These finishes look different and do not grow out at the same pace.
Shag-inspired bixie
Check where the shortest crown layer will sit when dry. A strong cowlick or fine density can make very short layers stand up or separate more than expected. Movement should come from deliberate layer placement rather than thinning every section.
Curly bixie
Agree on dry landmarks for the front, sides, and nape. Different sections can shrink by different amounts, so one wet cutting length may not produce an even dry outline.
Side-parted bixie
A part close to your natural fall usually requires less redirection. Before cutting the front, confirm whether you want it to clear the eyes naturally or whether you are comfortable styling it away from the face.
Longer-front bixie
The longer front may need trimming before the crown and back. Ask whether the side sections will actually reach behind the ears after drying if tucking is important to you.
Low-graduation bixie
Use a profile reference to show how rounded you want the back. Excessive graduation can create more stacked weight than intended, especially on dense or very straight hair.
How to Read Bixie Reference Photos Before Your Appointment
Bring front, profile, and back views of the same haircut where possible. If you cannot find all three, choose closely comparable cuts and explain which detail each picture represents.
The front shows fringe and face framing. The profile reveals ear coverage and the relationship between the crown and nape. The back shows graduation, neckline shape, and areas of retained weight.
For each reference, identify three things:
- Preserve: “I like the partly covered ears and the front ending at the cheekbone.”
- Avoid: “I do not want the exposed nape or the extra height at the crown.”
- Styling commitment: “This looks blow-dried. Could I get a similar shape with five minutes of styling?”
You cannot reliably infer styling time from a photograph alone. Use your estimate to start a conversation about the work behind the finish.
Replace “not too short” with visual landmarks: above the eyebrows, below the cheekbones, covering the upper ear, or ending at the natural nape hairline. For curls and coils, specify those positions when dry. Before committing to a haircut, Facefy’s Hair Style Try-On can help you preview different bixie-inspired silhouettes and compare front length, ear coverage, and overall shape using your photo.
Compare the photographed hair with yours as well. Differences in density, curl pattern, existing layers, and growth direction can change the result. Lighting can make hair look fuller, while tucking and camera angle can conceal side bulk. A reference communicates a direction, not a guaranteed duplicate.
What to Ask for at the Salon
An effective bixie request covers eight choices. These details are more reliable than asking for the style name alone.
- Overall dry length: Identify the longest sections and your shortest acceptable point. For example, keep the front near the cheekbones and avoid very short crown pieces.
- Ear coverage: Choose exposed, partly covered, or long enough to tuck. Say whether coverage matters on both sides.
- Neckline: Discuss taper versus graduation, followed by the edge shape: rounded, squared, softly irregular, or left longer.
- Crown volume: Ask for close and controlled, softly lifted, or deliberately separated.
- Perimeter weight: Choose fuller and bob-like or lighter and more pixie-like.
- Fringe: Specify no dedicated fringe, a side-swept section, a short fringe, or a front connected to longer face framing.
- Parting: Show your natural part and explain whether you want a side, center, or flexible part.
- Styling time: Give an honest daily allowance and state whether you use heat, styling products, or neither.
A consultation request might sound like this:
“I want a softly layered bixie with cheekbone-length front pieces and no very short crown sections. Please leave the upper ears partly covered, with a softly tapered, rounded neckline. I want gentle crown lift and a fairly full, bob-like edge. Keep a side-swept fringe connected to the front, follow my natural side part, and plan for about five minutes of styling without daily heat.”
Ask about techniques rather than prescribing them. Point cutting, where scissors cut into an edge, can soften a line. Razoring can create a feathered finish. Thinning shears and internal weight removal can reduce selected areas of bulk. Their suitability depends on strand condition, curl behavior, density, and the intended outline.
“Can we create movement while keeping the ends substantial?” is usually more useful than “Please thin it out.”
Three Practical Ways to Style a Bixie
1. Air-dried natural texture
Best suited to: Waves, curls, coils, and straight hair that already settles into a shape you like.
- Gently blot excess water rather than rubbing.
- Apply a lightweight mousse if you want lift without coating the roots. Use a light gel or curl-defining product if your priority is wave or curl definition and hold.
- Arrange the part and fringe before they start drying.
- Scrunch waves or define a few curl groups with your fingers.
- Leave the hair mostly undisturbed until dry.
This routine is quick in hands-on time, although the hair itself may take longer to dry.
Watch-out: Too much cream or repeated product layering can flatten fine hair, create buildup, or separate lower-density areas into visible gaps. Apply definition products selectively rather than coating every section equally.
2. Smooth directional blow-dry
Best suited to: Straight or wavy hair, directional fringes, and sides that need some control.
- Apply a heat protectant suitable for your hair. Heat protectants can help limit heat damage, but they do not make excessive heat harmless.
- Use moderate heat and controlled airflow.
- Guide the sides downward with your fingers or a brush, directing air from roots toward ends.
- Dry the fringe toward its intended resting position.
- Keep the crown close to the head for a compact finish, or lift the roots gently for more height.
A small paddle brush can guide the shape without adding the rounded volume of a full round-brush blowout.
Watch-out: Repeated high heat can damage hair, and stretching natural texture changes how the cut sits. If you usually wear curls, make sure the haircut also works without a smooth blow-dry.
3. Piecey or tousled finish
Best suited to: Layered straight or wavy hair, or selected dry curls that need a little definition.
- Begin with dry hair.
- Rub a very small dab of lightweight paste or cream between your hands.
- Touch selected ends through the sides and crown rather than coating the roots.
- Pinch a few pieces into place, then stop before every section looks separated.
Start with less product than you expect to need. You can add more, but removing excess usually means washing or thoroughly refreshing the hair.
Watch-out: Heavy wax can collapse fine hair, emphasize scalp visibility, or make short layers rigid. Avoid adding heat simply to force every piece into a different direction.
Bixie Maintenance and Grow-Out Expectations
Use these ranges as planning guides rather than fixed schedules:
- Roughly 4 to 6 weeks: A crisp neckline, close taper, or tightly controlled silhouette.
- About 6 to 10 weeks: A softer, longer bixie designed to tolerate visible growth.
Growth rate, curl shrinkage, neckline precision, and your preferred finish can shorten or extend either range.
Different parts of the cut may need attention at different times. The fringe can reach the eyes while the crown still feels short. Side weight may build around the ears before the back loses its shape. A clean neckline can look less defined after a relatively small amount of growth.
Between appointments, try:
- Rewetting and redirecting a fringe that has started separating.
- Tucking one side rather than forcing both sides flat.
- Using small clips to hold longer front sections.
- Applying a little lightweight hold at the roots instead of adding product everywhere.
- Shifting the part slightly, provided it follows a workable growth direction.
Routine reshaping preserves the existing design. A transition appointment changes it. Tell your stylist which one you want before cutting begins, especially if you are growing out the crown or building a fuller perimeter.
Common Bixie Problems to Discuss Before Cutting
A strong crown cowlick
Very short hair may stand up, while an intermediate length can split around the swirl. More length sometimes helps it settle, but the useful length varies.
Ask: “Where should we retain length around this cowlick, and how will it sit if I air-dry?”
Curl shrinkage
The fringe, crown, and nape may shrink by different amounts. Cutting them to matching stretched lengths does not guarantee an even dry outline.
Ask: “Where do you expect each section to sit fully dry, and can we assess the shape in my usual texture?”
A previous undercut
A short panel beneath longer hair may not yet connect to the intended bixie perimeter. Blending it immediately could require shortening more of the surrounding hair.
Ask: “Should we blend this area now, keep it deliberately separate, or let it grow before creating the final outline?”
Bulky sides on dense hair
Removing weight indiscriminately can leave short internal pieces pushing against longer hair or produce hollow ends.
Ask: “Would selective internal weight removal, a different graduation, or retained length control the width without thinning the perimeter too much?”
Over-texturizing on fine or fragile hair
Repeated thinning can make the ends look less substantial and leave fewer options for reshaping.
Ask: “How can you add movement while preserving visible density, and which sections should stay fuller?”
A neckline that seems to grow faster
The nape may show growth sooner because it began shorter or has a more defined edge.
Ask: “Could a small neckline cleanup maintain the shape without shortening the crown and sides?”
Unwanted crown height or a fringe fighting the part
Disconnected short layers can create more contrast than expected. A fringe cut against its natural fall may also separate daily.
Ask: “Can the crown connect more softly, and can we place the fringe around my natural part rather than relying on daily redirection?”
Aggressive thinning or razoring is not a universal answer for thick, curly, coily, fine, or fragile hair. The technique should solve an identified shape problem rather than being added automatically because the haircut is short.
How to Grow a Bixie Into a Bob or Shorten It Into a Pixie
Growing toward a bob
The main goal is to build a more continuous perimeter while the shorter layers catch up.
- Limit repeated shortening of the crown.
- Let the front and sides gain length.
- Reshape the nape selectively if it extends well below the sides.
- Gradually retain more weight at the outer edge.
- Use tucking, clips, and gentle part changes through intermediate stages.
A neckline cleanup can prevent an unintentionally back-heavy outline, but removing all new length at every appointment will delay the transition. Ask which sections need shaping and which should be left alone.
Shortening toward a pixie
Decide how much ear exposure and taper you want before taking length off the top. A closer nape with a longer crown gives a different result from a uniformly short crop.
You can retain a sweeping front, shorten it above the eyebrows, or keep extra crown length around a cowlick. Becoming a pixie does not require making every section equally short.
At each appointment, restate the destination. “I’m growing this into a bob” or “I want a closer pixie while keeping this front length” helps prevent a routine trim from resetting the previous shape.
Bixie Haircut Questions
Is a bixie longer than a pixie?
Generally, yes, particularly through the front and sides. However, a long pixie and a short bixie can overlap. Ear coverage, crown layering, and perimeter weight describe the difference more clearly than the names alone.
Can fine hair support a bixie?
Yes. Longer connected layers and a substantial perimeter can preserve visual fullness. Fine hair does not automatically need extensive texturizing. Too much can remove the weight that makes the shape look complete.
Does a bixie work on thick, curly, or coily hair?
It can, with an individual plan for bulk, expansion, shrinkage, and dry length. The important question is how the cut will behave in the finish you wear most often.
Does a bixie cover the ears?
It may cover them, partly cover them, or expose them. If tucking matters, ask the stylist to check that the relevant side sections will reach behind the ears after drying.
Do you need a fringe with a bixie?
No. An open forehead, longer front sections, or a side-swept shape can work without a separate fringe. Choose the front according to your natural part, growth direction, and preferred styling effort.
Can you air-dry a bixie?
Yes, especially when the layers are planned around your natural texture. Straight hair may dry into a compact shape, while waves, curls, and coils can produce more expansion and definition.
Is a bixie low-maintenance?
It can be easy to style without being infrequent to maintain. A close taper may need regular shaping even when daily styling takes only minutes. A softer bixie with blended layers usually offers more flexibility between appointments.
Explore Bixie Hairstyle Ideas
If you are comparing softer, more tapered, or longer-front versions, Facefy’s Hairstyle Finder can help you explore different hairstyle directions. Use those hairstyle ideas as a starting point, then bring reference photos and clear notes about your preferred dry length, ear coverage, neckline, and styling routine to your salon consultation.