Braided Ponytail Guide: Styles, Methods, and Comfortable Upkeep
Compare braided ponytail styles, choose a method for your hair, follow clear tutorials, and reduce slipping, excess tension, and flyaways.
A braided ponytail can be built in three main ways: braid the loose length of a secured ponytail, braid sections of hair toward a ponytail base, or attach extension hair at the base for added length or fullness. The right method depends on how much hair reaches the base, your density and texture, your styling skills, and how long you plan to wear the style.
For beginners, a three-strand braid in a low or mid-height ponytail is usually the simplest starting point. Intricate scalp patterns and extension-assisted versions require more sectioning or attachment control. No version should depend on painful tightness to remain secure.
Three Ways to Build a Braided Ponytail
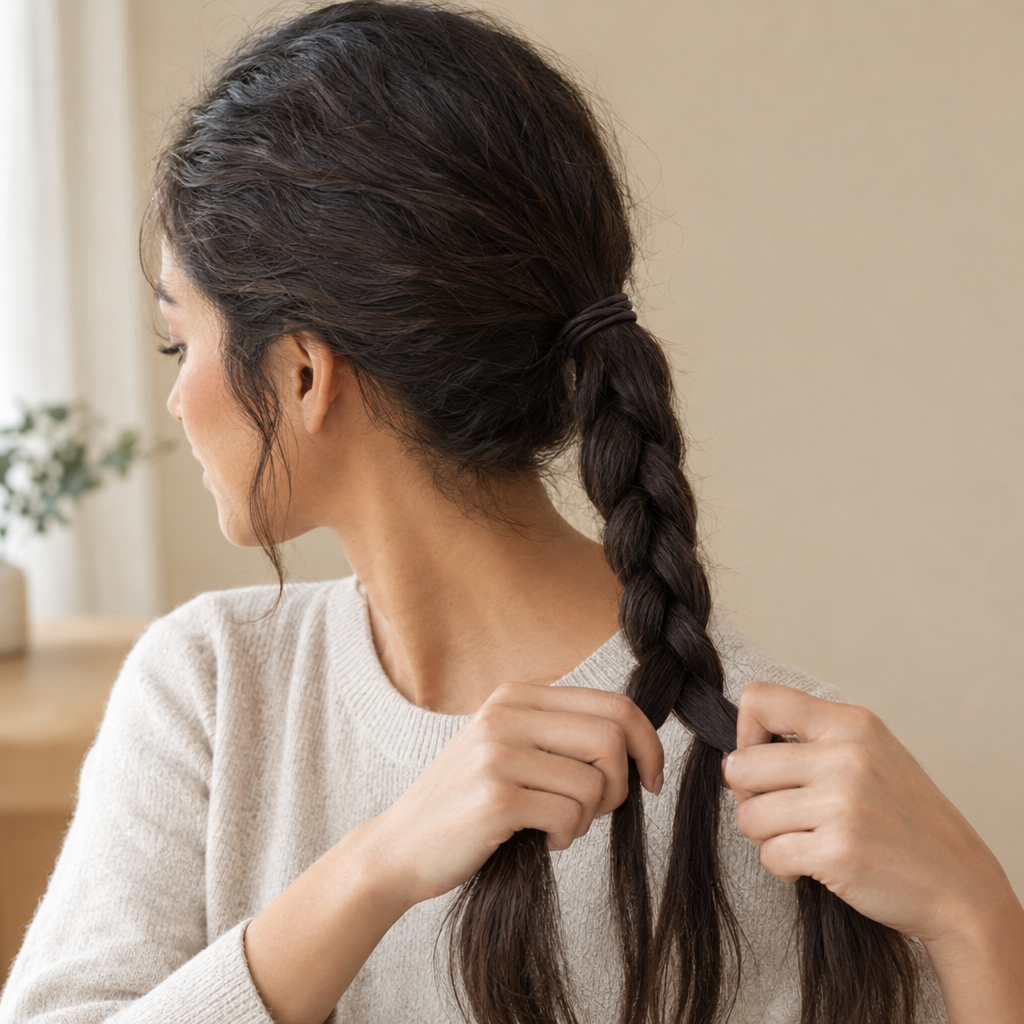
The same style name can describe different constructions. Before following a tutorial, identify where the braiding begins and how the ponytail is anchored.
| Construction | Starting condition and difficulty | Main advantage | Common problem |
|---|---|---|---|
| Braid an existing ponytail | Gatherable, braidable length; beginner | Simple construction | Uneven sections create abrupt tapering |
| Braid toward the base | Workable sections along the braid path; intermediate | Collects shorter hair progressively | Localized pulling in scalp sections |
| Attach extensions at the base | Stable, comfortable anchor; method-dependent | Adds length or fullness | Excess weight causes slipping or discomfort |
“Enough length” is a practical condition rather than one universal measurement. Your hair needs to reach the chosen base without stretching the hairline, and the gathered length must allow several braid crossings before the ends begin escaping.
Related style names refer to different details:
- Braid ponytail: Usually one braid hanging from an elastic-secured base.
- Feed-in braided ponytail: Small amounts of extension hair are introduced progressively while braiding toward the base.
- Cornrow ponytail: Close-to-scalp braids follow planned paths into a gathered tail. Extensions are optional.
- Box-braid ponytail: Existing individual braids, often formed from box-shaped sections, are gathered into a ponytail. This is not the same construction as one large braided tail.
Feed-in describes how added hair enters a braid. Cornrow describes a close-to-scalp construction. One style can use both techniques.
Choose a Method That Works With Your Hair
Use these five factors to narrow the construction before choosing accessories, decorative finishes, or extensions.
- Length: If everything reaches the base comfortably and leaves enough hair for several secure crossings, braid the existing ponytail. If shorter sections can join progressively, try a French or Dutch lead-in. If many sections cannot reach, a partial ponytail is usually better than forcing a full gathering.
- Density: Fine hair generally works well with a lightweight natural-hair braid. Thick hair may be easier to control when gathered in sections. Add extensions only if the finished base remains stable and comfortable.
- Texture: Straight or loosely waved hair may require an elastic with enough grip to prevent slipping. Curly or coily hair can be detangled in sections and braided in its natural texture. Straightening is optional, not a requirement.
- Desired wear time: For an event or an afternoon, choose a simple braid that is easy to remove. A retained scalp-braided style requires more planning for cleansing, drying, comfort, and removal.
- Tension tolerance: If high placement, close braiding, or added hair causes pulling, choose a lower and lighter construction. Discomfort means the method or anchor needs to change.
A three-strand tail is a manageable first project. Cornrow patterns and feed-in techniques require consistent section size, controlled hand tension, and even distribution of added hair. If you cannot see or comfortably reach the working area, ask a braider familiar with the intended construction.
Prepare the Hair and Build a Comfortable Base
Start with gently detangled hair and a comfortable scalp. Work through tangles from the ends upward while supporting each section. Avoid placing sore areas, irritated skin, or visibly fragile sections under tension.
Choose the base position before smoothing. Use a second mirror to check the front, sides, and back. For a centered result, compare the base with the middle of the nape rather than judging its position only from the front.
Gather thick hair in manageable sections. Keep shorter pieces separate until you know whether they reach the base naturally. Apply styling product selectively to areas that need added control rather than repeatedly coating and brushing the entire surface.
Choose a fabric-covered, snag-resistant elastic suited to your hair density. For very dense hair, gathering compatible sections before joining them at the base can work better than stretching one small band to its limit. Avoid stacking multiple tight bands around the same compressed area.
Heat is optional. If you use it, follow the tool instructions, apply an appropriate heat protectant, and avoid unnecessary passes.
Check the base immediately after securing it. Relax your forehead, turn your head, and look down. Pain, headache, bumps, persistent soreness, numbness, or visible hairline pulling mean the base should be loosened, repositioned, or removed. Do not attach a braid or extensions to an uncomfortable anchor.
How to Make a Three-Strand Braided Ponytail With Natural Hair
- Prepare and choose the placement. Detangle your hair and select a high, mid-height, or low base. A lower base can help shorter pieces reach without being stretched.
- Gather gradually. Smooth the hair with your hands or a suitable brush, then secure it with an elastic. The elastic should hold without pulling the scalp.
- Divide the ponytail into three sections. Aim for similar amounts of hair rather than three sections that merely look equal from the outside.
- Cross right over center, then left over center. Repeat the alternating pattern. Keep your hands near the working point so the sections remain controlled.
- Stop before the ends become too sparse. Secure the braid with a small snag-resistant elastic. A short loose tail is preferable to forcing fragile ends into repeated crossings.
- Refine the finish. Smooth individual flyaways, add a loose base wrap, or gently widen the outer braid loops if the construction is stable.
Check the style again after completing the braid. The hanging length changes the load on the base. Turn your head and let the braid move naturally. If the base becomes painful or begins pulling visibly, reduce the weight or rebuild it rather than tightening the elastic.
How to Create a French or Dutch Braid Into a Ponytail
This construction gathers hair progressively instead of bringing every strand directly to one elastic.
- Plan the path. Decide where the braid will begin and where the ponytail will sit. Separate the working area from the hair that will join at the base.
- Start with three sections. For a French braid, cross the outside sections over the center. For a Dutch braid, cross them underneath the center.
- Add hair consistently. Before each crossing, pick up a similar amount from the corresponding side. Correct bumps through section placement instead of pulling harder.
- Stop adding hair at the planned base. Gather the remaining loose hair with the completed scalp-braided section and secure them together.
- Choose the hanging finish. Leave the tail loose, create a three-strand or fishtail braid, or use a rope twist.
- Inspect the joins. Check for one unusually tight section, uneven additions, or pulling behind an ear. Rework the affected section rather than tightening the entire style.
A French or Dutch lead-in does not automatically involve extensions. Feed-in work specifically introduces added hair as the braid progresses. Cornrow ponytails generally use narrower, close-to-scalp rows that converge toward the base.
How to Make an Extension-Assisted Braided Ponytail
Extensions can add length or fullness, but they are optional. A lighter natural-hair braid is a better choice when added weight makes the base unstable or uncomfortable.
Attachment methods differ between drawstring pieces, wraparound ponytails, pre-braided pieces, and loose braiding hair. Follow the instructions supplied with the piece when available. The following method describes one common folded-bundle attachment for loose braiding hair.
- Build and test the natural ponytail first. Secure your natural hair with the original base elastic. The ponytail should remain comfortable when you turn your head and look down.
- Find the midpoint of the extension bundle. Fold the loose braiding hair at its midpoint. Position the fold against the underside of the natural ponytail base so the two loose halves hang downward on opposite sides of the natural ponytail.
- Add the attachment elastic. Place a second elastic around the folded midpoint of the extension bundle and the already secured natural ponytail. This second elastic encircles the natural ponytail immediately below the original base elastic while trapping the folded midpoint against it. It should not wrap around loose scalp hair outside the first ponytail, and it should not encircle only the two hanging extension ends.
- Distribute the extension hair. Bring the two hanging halves around the natural ponytail and divide the natural and added hair into the number of sections required for the chosen braid. Keep the extension fibers balanced so one side does not carry most of the weight.
- Braid the combined length. Work downward while maintaining controlled, even tension. Stop before the natural ends repeatedly escape or the extension fibers become difficult to manage.
- Cover the join if desired. Wrap a small section of hair, scarf, or lightweight cuff around an already secure connection. A decorative cover should not be responsible for holding a loose attachment together.
- Test the finished style with gentle movement. Turn your head and walk a few steps. Remove or rebuild the attachment if it slips, rotates, or feels heavy.
Not every bundle is designed for a folded attachment. A drawstring, wraparound piece, or pre-braided ponytail may use a separate comb, tie, or fastening system. Avoid improvised adhesives and excessive wrapping. If an attachment requires painful tightening to stay in place, it is not compatible with that base.
Braided Ponytail Styles and What Changes the Look
Choose placement before choosing the finish
A high ponytail places the braid near the crown and creates a lifted silhouette. It also asks more hair to travel upward, which can pull at the nape or hairline if the base is too tight.
A mid-height ponytail sits around the back of the head. It can feel more balanced when a high base shifts or when a long braid creates noticeable leverage.
A low ponytail sits near the nape and often accommodates shorter sections more easily. Check whether the braid will rub repeatedly against a collar.
A side ponytail brings the braid over one shoulder. Position the base so hair from the opposite side can reach without being stretched tightly across the scalp.
Choose placement according to reach, comfort, clothing, and the silhouette you prefer. It does not need to follow a rigid facial-category rule. If you’re curious about your facial appearance beyond hairstyle choices, Facefy’s face-rating tool offers an AI-generated analysis of visible facial features.
Compare braid constructions and finishes
| Variation | Defining feature | Effort and wear considerations |
|---|---|---|
| Three-strand | Three sections crossed alternately | Beginner-friendly; ends may loosen |
| French | Hair added while sections cross over | Intermediate; surface softens with wear |
| Dutch | Hair added while sections cross under | Intermediate; raised edges become fuzzier |
| Fishtail | Small pieces cross between two main sections | Slower to create; small pieces can escape |
| Rope twist | Two twisted sections wrapped together | Quick; unsecured ends may unravel |
| Feed-in | Extension hair introduced progressively | Skilled technique; roots loosen as hair grows |
| Cornrow | Braids follow close-to-scalp paths | Skilled technique; scalp sections loosen gradually |
| Bubble ponytail | Elastics divide the tail into puffed segments | Simple; segments may flatten during wear |
| Box-braid ponytail | Individual braids gathered together | Quick to gather; cumulative weight matters |
A rope “braid” is technically a twist, while a bubble “braid” is formed with elastics rather than interlaced strands. Both can create a similar overall silhouette, but their construction and removal steps differ.
A sleek surface is a finish rather than a separate braid type. It can be combined with several constructions. A looser finish allows more movement and visible texture, although shorter sections may release sooner.
Cornrows, box braids, and feed-in methods have important roots and continuing significance in Black hairstyling traditions. Use their established names and choose a braider familiar with the specific technique rather than treating the constructions as interchangeable.
Four adjustments that alter the result
- Change the height. For a simple elastic-based style, support the braid, release the base, and regather it higher or lower. Do not drag a tight elastic along the hair. Scalp-braided paths usually need to be reworked when the destination changes.
- Switch the hanging braid. Keep a comfortable base and undo only the loose length to change a three-strand braid into a fishtail or rope twist.
- Wrap the base. Cover the elastic with a small section of hair or a lightweight ribbon. Secure it without adding multiple tight turns.
- Widen suitable braid loops. On a stable three-strand braid, gently ease the outer loops outward from the bottom upward. Avoid pulling scalp sections, fragile ends, or extension attachment points.
Adapt the Style for Short, Fine, Thick, Curly, Coily, or Layered Hair
Hair too short to gather fully
- Lower the base so more hair reaches naturally.
- Use small braided sections to collect hair along a path.
- Choose a partial ponytail and leave the shortest areas free.
- Secure selected loose pieces with smooth pins without pulling them taut.
Extensions add length beyond the base. They cannot correct a natural anchor that does not hold comfortably.
Fine hair that loses volume
Use a lightweight elastic and avoid saturating the roots with slippery product. A natural-hair tail or a modest amount of added hair will usually place less stress on the base.
A stable three-strand braid can look fuller when its outer loops are eased outward slightly. Stop if the ends begin escaping or the base starts moving.
Thick hair that overwhelms one elastic
Divide the gathering process into sections, then bring them together at the intended base with an elastic designed for the density.
If the band feels strained or compresses the base painfully, change the anchor instead of adding another tight turn. A lower position may distribute the weight more comfortably.
Curly or coily hair without straightening
- Detangle in workable sections using a conditioning product and method suited to your texture.
- Preserve natural curls where you want visible texture, smoothing only the areas that need more control.
- Use section sizes that allow the hair to separate without snagging.
- Leave short hairline pieces soft rather than repeatedly brushing them into a rigid finish.
If you want to compare braided ponytail silhouettes while keeping your natural texture in mind, Facefy’s Hairstyle Finder can provide a visual preview. Results are estimates rather than guarantees. Lighting, camera angle, crop, visible texture, and image quality can affect the preview, and an image cannot determine attachment strength or scalp comfort.
Layered hair or hair that cannot support extensions
Smaller lead-in sections can control uneven lengths better than one large gathering motion. Where necessary, place discreet pins along the direction of the braid rather than across it, with the pin ends positioned away from the scalp.
Stop braiding before sparse ends repeatedly escape. If added hair causes pulling, choose a natural-hair, partial, or lower-positioned version.
Fix Slipping, Sagging, Flyaways, and Uneven Braids
Correct the part that is failing. More product or tighter wrapping will not compensate for an unsuitable anchor or unbalanced construction.
| Observable problem | Likely cause | Specific correction |
|---|---|---|
| Sagging base | Weak hold or excess weight | Replace the elastic or reduce added hair |
| Off-center placement | Uneven gathering | Release and realign using a rear mirror |
| Slipping extension | Incompatible or unbalanced anchor | Remove and use the intended attachment method |
| Exposed elastic | Cover section shifted | Rewrap loosely and secure with a concealed pin |
| Uneven, rapidly tapering braid | Unequal sections or natural layers | Rebalance sections and finish above sparse ends |
| Short layers escaping | Working sections are too large | Use smaller lead-ins or discreet pins |
| Persistent flyaways | Friction, short growth, or natural texture | Smooth individual areas and allow soft texture elsewhere |
| Stiff finish | Excess product or compression | Remove buildup where possible and release tight sections |
A naturally layered tail may still taper after careful sectioning. That differs from a braid that becomes uneven because one starting section contained substantially less hair.
If a wrapped base repeatedly unravels, use a small lightweight accessory rather than winding additional hair tightly around the anchor.
Keep the Style Comfortable During Wear
Recheck the hairline, ponytail base, and scalp-braided sections after normal movement. If you retain the style overnight, check them again the next morning.
Loosen or remove the style if you notice pain, headache, bumps, persistent soreness, numbness, or visible hairline pulling. A style described as protective can still stress the hair when it is too tight, too heavy, poorly attached, or removed roughly.
Repeated or prolonged pulling can contribute to traction-related hair loss. The American Academy of Dermatology explains how hairstyles that pull can cause hair loss.
There is no universal safe wear duration. Construction, hair condition, scalp response, cleanliness, and maintenance all affect how long a style remains practical.
Clean and dry according to the construction
A simple elastic-based ponytail is usually easiest to remove before normal washing. Undo the braid and release the base so you can cleanse, rinse, condition, detangle, and dry your hair without working around a compressed anchor.
A retained scalp-braided ponytail needs enough access for gentle cleansing. Apply cleanser to reachable scalp areas without scratching or aggressively rubbing the braid paths. Rinse thoroughly so product is not left around the roots, braid joins, or extension attachment.
Allow the roots, scalp-braided sections, and attachment area to dry completely. Dense braids and added hair can remain damp longer than the visible surface suggests. Avoid covering or sleeping on the style while the roots are still wet.
If the construction prevents comfortable cleansing, complete rinsing, or thorough drying, remove it rather than preserving its appearance. Persistent scalp symptoms or hair loss should be discussed with a qualified healthcare professional.
Sleep, Refresh, and Remove the Braid Gently
For sleep, loosely contain the braid with a smooth scarf or bonnet, or use a smooth pillowcase. Do not wrap the braid into a position that presses painfully against the base.
Support long extensions so they do not hang over the edge of the bed or pull when you turn. If you cannot find a comfortable sleeping position, remove the style.
Between washes, address individual areas instead of repeatedly tightening the entire ponytail. Smooth a small surface section, replace a loose pin, or redo the hanging braid while leaving a comfortable base undisturbed. Ribbons, bows, cuffs, and scarves should remain lightweight and should not conceal an unstable attachment.
For a simple ponytail with no scalp braiding:
- Remove accessories and locate every pin.
- Release the elastic at the end of the hanging braid.
- Undo the braid from the bottom upward.
- Remove extensions according to their attachment method.
- Release the ponytail base without dragging the elastic through tangles.
- Separate shed hairs gently, then detangle in sections.
For a ponytail built from French, Dutch, cornrow, or other scalp-braided sections, use this order:
- Remove accessories and pins.
- Release the end elastic and undo the hanging braid.
- Remove any extension attachment that can be released without disturbing the scalp braid.
- Release the ponytail base elastic so the endpoint of the scalp braid is no longer secured.
- Undo the scalp braid from its former ponytail endpoint back toward its starting point.
- Separate shed hairs gently and detangle in sections.
Do not attempt to unbraid scalp sections while their endpoint remains trapped inside the ponytail base. Give a sore scalp a break from tension rather than immediately rebuilding the same style.